
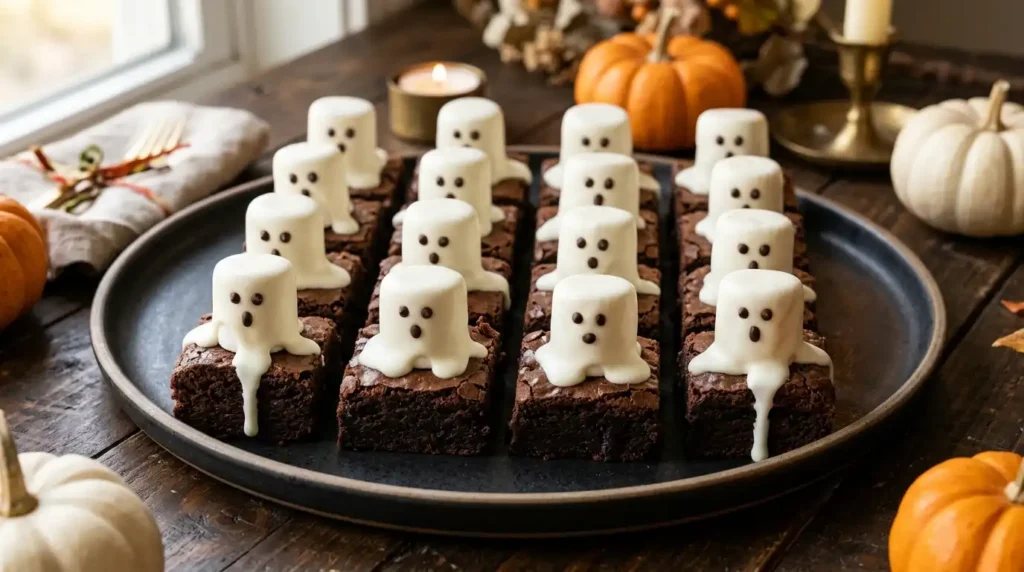
These brownies put a Halloween twist on a classic chocolate treat, with marshmallows and drips of white candy coating turning each square into a little ghost. A few miniature chocolate chips give each ghost its own funny expression.
They’re a fun choice for Halloween parties, family baking afternoons, or a dessert table that needs something more playful than ordinary brownies. Despite their playful appearance, these little ghosts are surprisingly easy to put together using everyday kitchen tools and a handful of simple ingredients.
This recipe starts with a homemade cocoa brownie base. Once the brownies have cooled, each square gets a marshmallow ghost on top. If you’re short on time, start with a boxed brownie mix and follow the same decorating steps.
Halloween Ghost Brownies at a Glance
| Recipe Details | Information |
| Recipe | Halloween Ghost Brownies |
| Category | Desserts |
| Servings | 16 brownies |
| Prep Time | About 30 minutes of active work |
| Bake Time | Approximately 25–35 minutes |
| Cooling Time | About 60–90 minutes |
| Decoration Setting Time | About 15–25 minutes |
| Estimated Total Time | Allow roughly 2 hours and 10 minutes to 3 hours from start to finish. |
| Pan Size | 8 × 8 inches (20 × 20 cm) |
| Oven Temperature | 350°F (175°C) |
| Difficulty | Easy |
The total time includes cooling and setting, so you won’t be working in the kitchen the entire time. Actual timing depends on your oven, the brownie thickness, and the temperature of your kitchen.
Table of Contents
Halloween Ghost Brownies Recipe Card
This recipe makes 16 chocolate brownie squares topped with marshmallow ghosts. The brownie base is designed to be moist enough to enjoy on its own while remaining firm enough to support the decorations.
Ingredients
For the Brownies
- ½ cup (115 g) of unsalted butter — melt it first, then let it cool for a few minutes.
- 1 cup (200 g) granulated sugar
- 2 large eggs, preferably at room temperature
- 1 teaspoon vanilla extract
- ⅔ cup (approximately 57 g) unsweetened cocoa powder
- ¾ cup (90 g) all-purpose flour
- ¼ teaspoon fine salt
- ½ cup (85 g) semisweet chocolate chips, optional
For the Marshmallow Ghosts
- 16 large marshmallows
- 9 oz (about 255 g) white candy melts or white confectionery coating
- 48 miniature chocolate chips, approximately, for the eyes and mouths
- A small amount of solid vegetable shortening, optional, if recommended for thinning your candy coating
Equipment You’ll Need
- 8-inch square baking pan
- Parchment paper
- Large mixing bowl
- Whisk and rubber spatula
- Fine-mesh sieve, optional
- Microwave-safe bowl
- Wire cooling rack
- Small spoon
- Sharp knife
Ingredient Note: White candy melts are usually easier to handle for this decoration than ordinary white chocolate chips. They are designed for coating and tend to set without the tempering process required for some real chocolates.
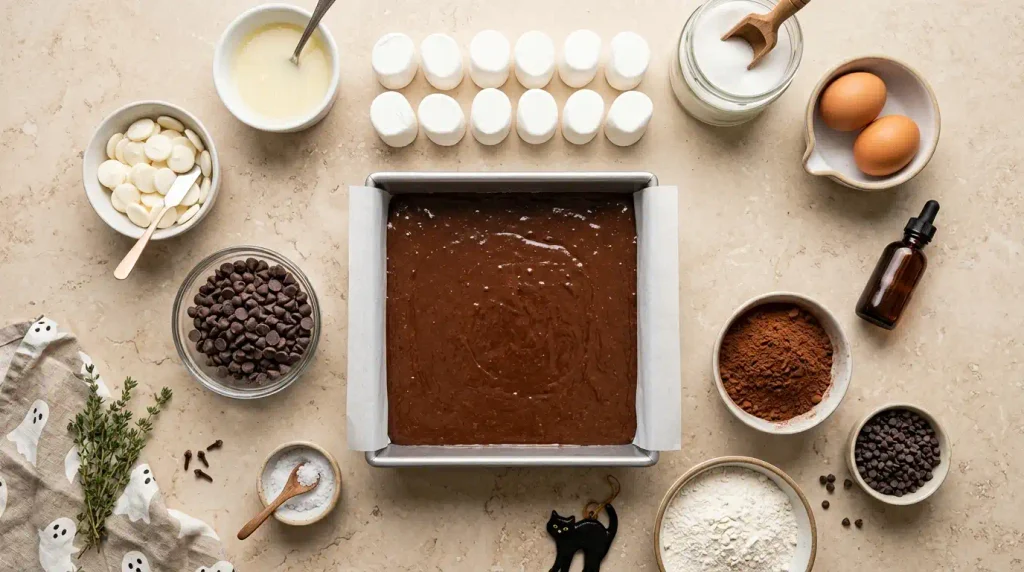
From Brownie Batter to Marshmallow Ghosts
Step 1: Get Your Oven Hot and Line the Baking Pan
Preheat your oven to 350°F (175°C) and position a rack near the center.
Lightly grease an 8-inch square baking pan. Fit a sheet of parchment paper inside the pan, allowing it to extend beyond two edges so you can easily remove the brownies after baking.
A light-colored metal pan is a useful choice for even baking. If you’re using a dark metal or glass pan, follow any temperature adjustments recommended by the pan manufacturer and watch the brownies carefully toward the end of baking.
Step 2: Combine the Butter and Sugar
Start by melting the butter over low heat in a small saucepan, or warm it in the microwave a few seconds at a time, checking frequently. Set it aside briefly so it is no longer piping hot.
Transfer the melted butter to a roomy mixing bowl, then pour the sugar over it.
Whisk until the ingredients are evenly combined. The sugar may not dissolve completely, and the mixture can still look slightly grainy at this stage.
Step 3: Add the Eggs and Vanilla
Once the butter and sugar are mixed, add both eggs, followed by the measured vanilla.
Give everything a gentle whisk until the eggs are fully incorporated and the batter looks a little thicker with a light sheen.
There’s no need to beat in lots of air. A relatively dense batter helps produce brownies with a moist, rich texture rather than a cake-like crumb.
Step 4: Fold in the Dry Ingredients
Sift the cocoa powder into the bowl to remove any lumps, then add the salt and stir gently until everything is combined.
Add the flour and fold it in with a spatula, scraping along the bottom and sides of the bowl.
Stop when no visible streaks of dry flour remain. For an extra chocolatey touch, gently work the optional chocolate chips into the batter once the flour has been incorporated.
The batter should look thick and chocolatey rather than thin or pourable. Avoid working it longer than necessary after adding the flour.
Step 5: Bake the Brownie Layer and Look for the Right Texture
Transfer the brownie mixture to your prepared pan, spreading it carefully with a spatula until the surface is level and the corners are filled.
Bake for approximately 25–35 minutes, beginning to check around the 25-minute mark.
Look for these signs:
- The edges appear set and slightly firm.
- The middle should look cooked on top, even if the surface still has a slight sheen.
- A toothpick inserted into a spot without a chocolate chip comes out with moist crumbs, not raw liquid batter.
If the center still looks underbaked, return the pan to the oven for another 2–3 minutes and check again.
Baking times vary, especially between different types of pans. The visual and toothpick checks are more useful than relying on the clock alone.
For another helpful example of checking brownie doneness, see King Arthur Baking’s Fudge Brownies guide.
Step 6: Cool and Cut the Brownies
Place the pan on a wire rack and allow the brownies to cool completely, usually around 60–90 minutes.
Grip the parchment paper hanging over the sides of the pan and carefully lift out the brownie layer.
Cut the brownie slab into a 4-by-4 grid to make 16 squares, each approximately 2 inches wide.
For cleaner slices, use a sharp knife and remove any sticky brownie crumbs from the blade before making the next cut.
If the brownie slab is too soft to cut cleanly, refrigerate it briefly until firmer before slicing.
Step 7: Get the White Coating Ready
Keep the marshmallows nearby for assembly.
Put the white candy melts in a completely dry bowl that can go in the microwave. Begin with a short burst at half power, then remove the bowl and stir. Continue in brief bursts, checking the texture every time. If the candy melts come with different melting instructions, use the method recommended on their packaging.
For more detailed melting and thinning advice, take a look at Wilton’s Candy Melts melting guide.
Don’t wait for every piece to disappear in the microwave. Stirring can melt the last bits without overheating.
Hold a spoonful of the melted white coating just above the bowl to check its consistency. It should slide off smoothly, without splashing or clumping. If thinning is necessary, use only a product recommended for candy melts, such as compatible shortening, and follow the label. Avoid mixing in water or dairy liquids, as even a small splash can cause the melted candy coating to turn thick and lumpy.
Step 8: Build the Ghosts’ Bases
Lay the brownie pieces across a parchment-covered tray. Leave room to work around each square.
Set a marshmallow briefly on a brownie square to find its most stable end. Lift it, add a dab of melted coating to the brownie, then place the marshmallow back in position. That small spot acts like glue.
Repeat for all sixteen squares. If one starts to lean, straighten it before the coating underneath sets. Leave the tray alone for a moment to let those little anchors firm up.
Step 9: Create the White Ghost Drapes
Imagine you’re giving each marshmallow a loose, uneven cloak rather than trying to frost a cake neatly. With a spoon, drop some white coating onto the top and guide it toward the edges.
Let a few trails fall farther down the sides than others. A little can land on the brownie. You still want part of the chocolate base visible beneath the ghost.
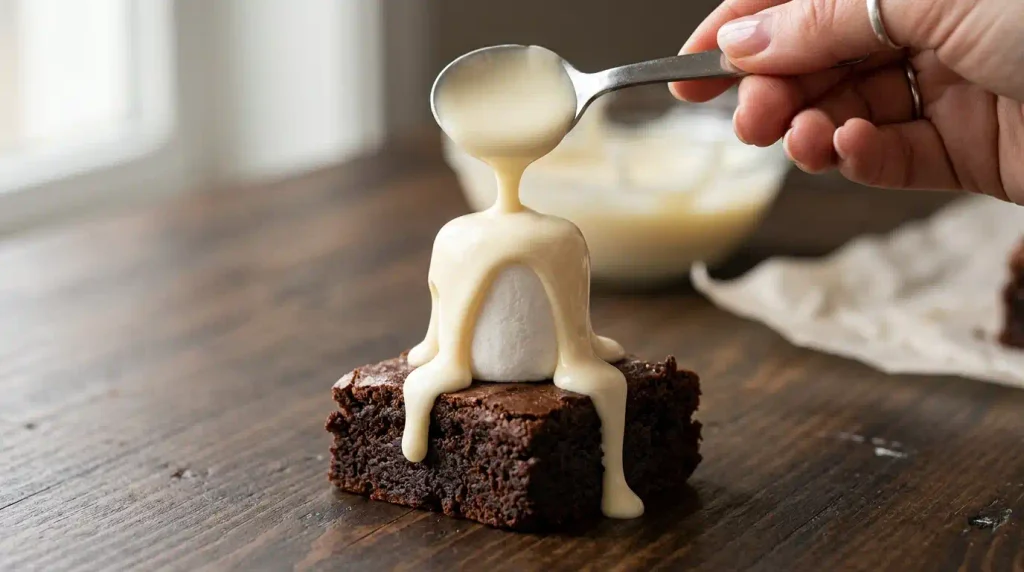
Make the first one your practice piece. If the white layer rushes off too quickly, give the coating a moment to cool. If it barely moves, warm it briefly according to the package directions. Then coat the other marshmallows.
Keep a clean teaspoon nearby to tidy large puddles before the coating sets around each brownie.
Step 10: Add Faces and Let Them Set
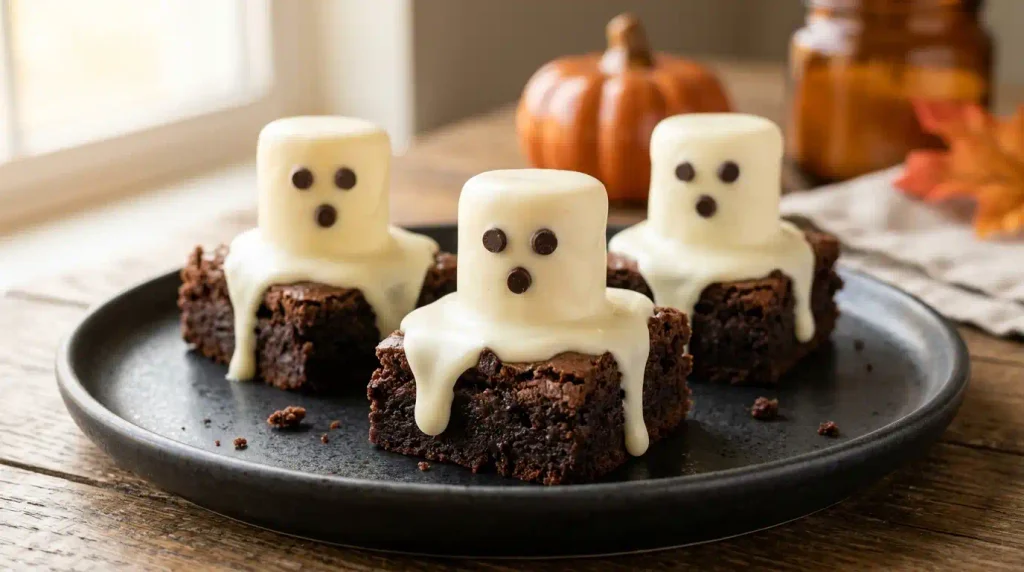
While the white coating is still soft, arrange two mini chocolate chips near the top of each ghost, then add one underneath to form a little mouth. Place the rounded sides outward so the dark features show clearly against the white.
The faces needn’t match. A low mouth can look surprised, while eyes set close together give another ghost a completely different expression.
Decorate a couple of brownies at a time rather than covering the whole tray first. This way, the chips have a soft surface to grip. Once each ghost has a face, leave the tray undisturbed until the coating is firm, usually about 15–25 minutes depending on the product and room temperature.
Tips for Decorating Halloween Ghost Brownies
Keep the Assembly Simple
Set out the brownies, marshmallows, chips, and spoon before melting anything. Organization helps more than fancy equipment. If children are helping, let an adult handle the warm coating and invite the kids to choose expressions once it’s safe to decorate.
Give the Ghosts Room
Marshmallows that sit too close to a brownie edge can make the dessert harder to pick up. Center them as well as you can, especially if the squares aren’t perfectly identical. On a party tray, leave space around the white drips.
Make Them Travel-Friendly
Avoid packing these treats tightly. Use a rigid container deep enough for the tallest marshmallow. Don’t place another dessert directly on top of the ghosts, even after their coating has hardened.
Easy Halloween Ghost Brownies Variations
Use a Brownie Mix
Short on baking time? A boxed mix works as the chocolate foundation. Prepare it exactly as its packaging directs, including any required eggs or oil. Let the baked slab cool fully before slicing; a warm or crumbly base makes decorating difficult. Once you’ve cut the cooled brownies into squares, follow the decorating steps above to give each piece its own marshmallow ghost.
Make Little Ghost Bites
For smaller party portions, cut the brownie slab into more pieces and swap the large marshmallows for mini ones. Their faces may be too small for regular miniature chocolate chips, so a tiny touch of dark decorating icing can be easier to control. These are particularly handy for a shared dessert board.
Add More Chocolate
Stir the optional semisweet chocolate chips into the brownie batter before baking if you want extra pockets of chocolate. You can also finish the exposed brownie corners with a light sprinkle of dark chocolate shavings. Don’t cover the ghost faces.
Choose a Gluten-Free Base
A trusted gluten-free brownie mix or recipe can take the place of the standard base. Follow its own baking directions, since ingredients and timing may differ. Also check the labels on the marshmallows, white coating, and chocolate chips. When cooking for someone with celiac disease, clean utensils and separate preparation surfaces matter too.
For another sweet option, see our Easy Gluten-Free Chocolate Chip Cookies.
How to Store and Make Ghost Brownies Ahead
The easiest way to spread out the work is to bake the brownie layer a day before your gathering. Once it’s completely cool, keep it covered and save the marshmallow decorating for later.
Storing the Finished Brownies
After the white coating has set, move the decorated squares into a lidded container in a single layer. Leave headroom above the marshmallows; a lid pressing down on their faces can damage the design.
Choose a cool, dry storage spot away from sunlight and heat. Try to enjoy these treats within the next 2–3 days, while the brownie base is still soft and the ghost decorations look their best. If you need more room, divide them between containers instead of stacking them.
Should Ghost Brownies Be Refrigerated?
A cool room is generally suitable for brownies made with the ingredients in this recipe.
On warmer days, keep the decorated brownies in an airtight container in the fridge to prevent the white coating from softening. However, condensation may affect the appearance of the white coating when the brownies return to room temperature.
For the neatest finish, decorate the brownies as close to serving time as your schedule allows.
Can You Make Ghost Brownies the Day Before?
Yes. Baking the brownie base the day before is a practical option.
Once completely cool, cover the brownie slab well and keep it in a cool place.
Cut and decorate the pieces the following day. This keeps the most delicate part of the recipe closer to serving time without requiring you to bake everything at once.
If you’re preparing several desserts, having the brownie base ready makes the final decorating process much easier.
Can You Freeze Ghost Brownies?
The undecorated brownie base is the better option for freezing.
Wrap the cooled brownie slab or individual squares tightly, then place them in a freezer-safe container for up to 2 months for best quality.
Thaw the brownies while covered, allow them to return to room temperature, and add the marshmallow decorations afterward.
Freezing fully decorated pieces is less reliable because moisture can change the appearance of the coating and the texture of the marshmallows.
Common Problems and Simple Fixes
Why Are My Brownies Dry?
Dry brownies may have spent too long in the oven or contained more flour than intended.
Measure flour carefully, preferably by weight, and start checking the brownies before the end of the suggested baking range.
The center should be baked through but still retain a little moisture.
Why Is My White Coating Grainy?
Candy coating may become grainy after excessive heating or contact with moisture.
Before you start, check that your utensils are free of moisture and warm the candy melts in small, controlled bursts.
If the coating turns into stubborn clumps that won’t smooth out with stirring, it’s better to start fresh than keep heating it.
Why Won’t the Marshmallow Stay Upright?
The marshmallow may have an uneven base, or the small dot of coating underneath it may not have firmed up enough.
Choose a stable position near the center of the brownie and give the attachment a moment to set before covering the marshmallow.
Why Are the Ghost Faces Sliding?
This usually happens when the white coating is still too fluid to hold the chocolate chips in place.
Allow the coating to cool slightly before attaching the faces, but don’t wait until it has hardened completely.
Frequently Asked Questions
Can I Make Halloween Ghost Brownies Without Marshmallows?
Yes. Instead of marshmallows, you can pipe thick white frosting directly onto the cooled brownies in small ghost-shaped swirls.
Use a firm frosting that can hold its shape, then add dark chocolate decorations for the faces.
Keep in mind that frosting decorations may require different storage conditions depending on their ingredients.
Can I Make the Ghost Coating With White Chocolate?
Yes, although real white chocolate can be more sensitive to heat and may not set the same way without proper tempering.
If you’re new to decorating chocolate treats, white candy melts are generally easier to work with.
Can I Use Store-Bought Brownies?
Absolutely. Choose brownies that are thick and firm enough to support an upright marshmallow.
Cut them into even squares if needed, then proceed with the decorating instructions.
This is a useful shortcut when you want Halloween treats without baking a separate brownie base.
How Many Ghost Brownies Does This Recipe Make?
The recipe produces 16 pieces when you cut an 8-inch square brownie slab into a 4-by-4 grid.
You can make smaller portions for a larger party, but you’ll need to adjust the number and size of marshmallows accordingly.
Are Halloween Ghost Brownies Vegetarian?
Not necessarily.
Many marshmallows contain animal-derived gelatin. For vegetarian guests, look for marshmallows made without animal gelatin, and check that the candy coating and chocolate chips are vegetarian-friendly too.
The standard brownie base also contains eggs and dairy, so it is not vegan.
Do I Need Special Halloween Baking Equipment?
No. You can prepare this dessert using an ordinary square baking pan, a mixing bowl, and a spoon.
The ghost shapes come from the marshmallows and white coating, so special Halloween molds are unnecessary.
How to Serve Halloween Ghost Brownies
Place the finished brownies on a dark serving tray or wooden board to create contrast with the white marshmallow ghosts.
For a Halloween dessert table, you can arrange them alongside fresh fruit, chocolate cookies, or other small treats.
To complete the Halloween look, decorate the table with paper bats or tiny pumpkins, keeping them separate from the brownies.
These brownies are also convenient for individual portions because each square comes with its own decoration.
If you’re planning a dessert spread with different textures, our Oreo Ice Cream Cake Recipe offers a chilled alternative to the chocolate brownies.
Final Thoughts
Halloween Ghost Brownies bring together a simple chocolate base and a playful marshmallow decoration that works well for parties and seasonal baking.
The brownie base can be prepared ahead of time, leaving only the coating and chocolate faces to finish before serving.
Keep the decorations simple, let the white coating set properly, and you’ll have a tray of little chocolate ghosts ready for your Halloween celebration.
Leave a Reply