
An ice cream cake is a fun alternative to a traditional birthday cake, especially when you want a chilled dessert instead of something baked. This homemade Oreo ice cream cake brings together three favorite textures: a buttery chocolate-cookie base, smooth vanilla ice cream, and a layer of chocolate fudge. A fresh whipped cream topping finishes the cake just before it reaches the table.
Instead of baking, you assemble the dessert directly in the pan using the cookie crust, ice cream, and fudge. The main task is arranging the layers and giving each one enough time to set in the freezer. Make it the day before a celebration, or keep it simple and serve it as a weekend dessert. What I love most about this cake is the mix of crunchy Oreo cookies, creamy ice cream, and rich chocolate fudge.
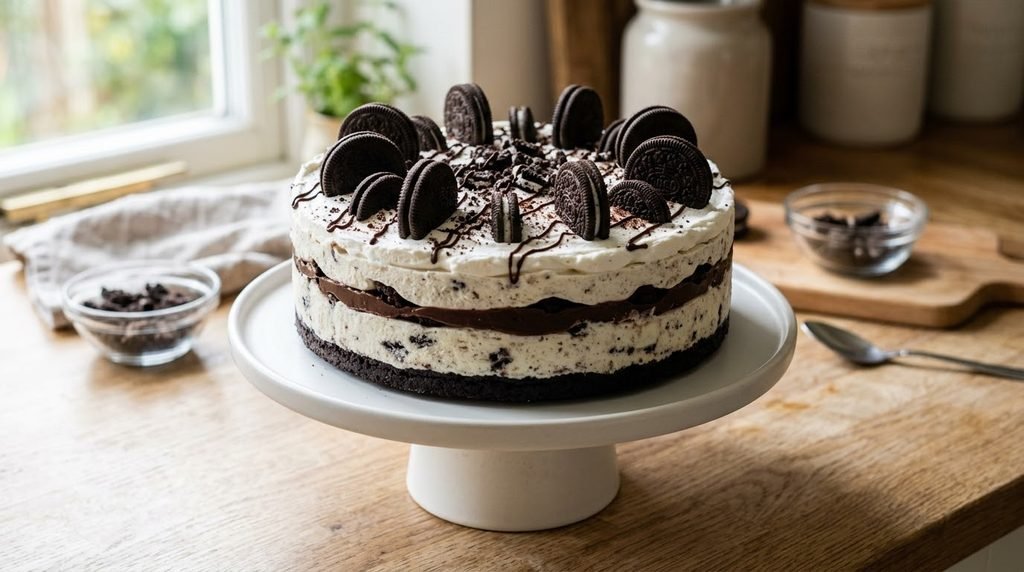
Table of Contents
Ingredients You Will Need
Gather the ingredients before starting. The ice cream should soften enough to spread, while the fudge sauce should be cool before it touches the frozen layers.
- 24 Oreo cookies: These form the base of the cake. Break the cookies down into evenly sized crumbs to create a firm, even base for the cake.
- ¼ cup unsalted butter, melted: Mix this with the cookie crumbs to help the base firm up.
- 1.5 quarts vanilla ice cream: This is approximately 6 cups. Choose a flavor and brand you enjoy, and let it soften slightly before spreading.
- 1 cup hot fudge sauce: Use this for the chocolate layer in the center. It should be spreadable, not hot.
- 1 cup heavy whipping cream: This becomes the topping.
- 2 tablespoons powdered sugar: Add this to the cream before whipping.
- Extra Oreo Cookies (Optional): Reserve a few extra cookies to sprinkle over the cake or arrange on top for an attractive finish before serving.
Ingredient Swaps
Gluten-Free Alternative: For a gluten-free cake base, choose chocolate sandwich cookies specifically labeled gluten-free and use them in place of the regular Oreos. Check the labels on the ice cream, fudge sauce, and other packaged ingredients, too. If the dessert is for someone with celiac disease, take care to prevent contact with gluten-containing crumbs and kitchen tools. For more guidance on choosing gluten-free ingredients for baking, read our Gluten-Free Pantry Guide.
Dairy-Free Option: To make this cake without dairy, use plant-based substitutes for the ice cream, butter, chocolate sauce, and whipped topping, along with cookies that contain no dairy ingredients. Confirm that every product fits your dietary requirements.
For a richer chocolate taste: Use chocolate ice cream in place of vanilla to give the cake a deeper cocoa flavor. This changes the flavor of the finished dessert but keeps the same basic layering method.
For a different finish: Try chocolate curls, extra cookie crumbs, or a small drizzle of fudge sauce on top.
Preparation Time and Servings
Plan ahead and set aside several hours for the cake to chill in the freezer before serving. Although assembling the layers is relatively straightforward, the freezer time is essential for obtaining slices that hold their shape.
- Hands-on preparation: About 15 minutes
- Freezing between layers: Approximately 30 minutes
- Final freezing: At least 4 hours
- Estimated total elapsed time: About 4 hours and 45 minutes
- Pan size: 9-inch springform pan
- Yield: One cake, cut into 12 slices
These times are estimates. A warmer kitchen or a softer batch of ice cream may affect how long the layers take to firm up. For a cake that is easier to slice, prepare it the day before serving and leave it covered in the freezer overnight.
How to Assemble the Oreo Ice Cream Cake
1. Prepare the Cake Pan
Start by fitting a circle of parchment paper into the base of a 9-inch springform pan. The removable ring allows you to take the cake out more easily once it has frozen. If you are using a regular cake pan instead, line it with plastic wrap and leave extra material over the edges so you can lift the frozen dessert out without damaging its shape.
2. Build the Cookie Base
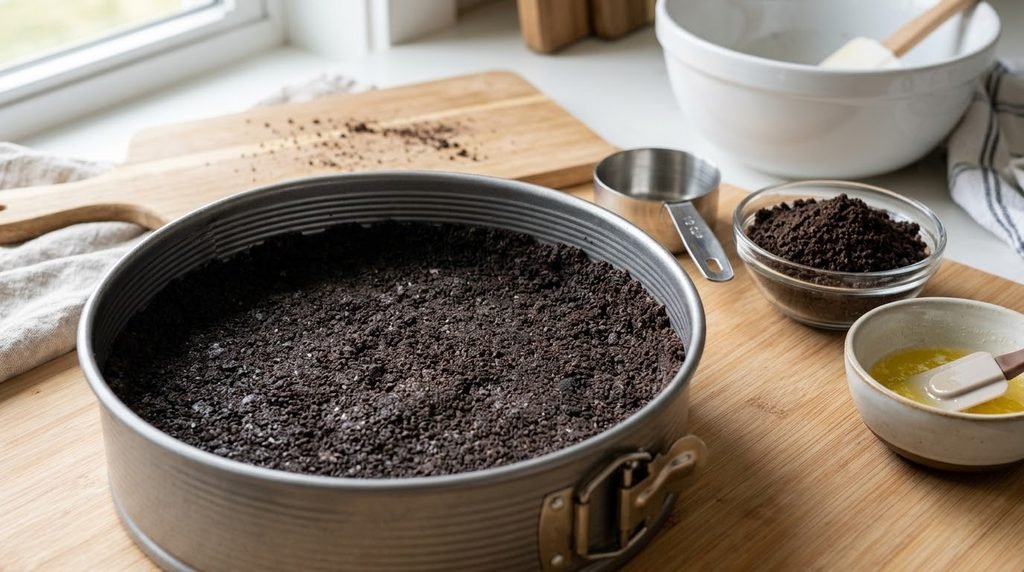
Use a food processor to turn the Oreo cookies into fine crumbs. If you do not have one, place the cookies in a sturdy resealable bag and crush them with a rolling pin. Place the crushed cookies in a mixing bowl and pour in the melted butter. Stir well until the crumbs have a slightly moist texture and can be shaped into a crust when pressed together.
Transfer the mixture to the pan. Use the flat bottom of a measuring cup to press the crumbs into a compact layer, paying particular attention to the edges.
Why this matters: A firmly packed base is easier to cut and serve than one made from loose crumbs. Try to keep the thickness even across the bottom of the pan.
3. Spread the First Portion of Ice Cream
Let the ice cream soften briefly at room temperature until it is easy to scoop but still thick enough to hold its shape.
Spoon half of the ice cream over the cookie base. Spread it gently into an even layer, taking care not to disturb the crumbs underneath.
Place the pan in the freezer for about 20 minutes to firm up the first layer before adding the chocolate filling.
4. Add the Chocolate Fudge
Heat the fudge sauce according to the package instructions until it becomes smooth and easy to pour.
Let the sauce cool briefly until it is warm rather than hot. Spoon it over the partially frozen ice cream and gently spread it with the back of a spoon, keeping the layer underneath intact. For extra crunch, sprinkle a few crushed Oreo cookies over the fudge, if desired.
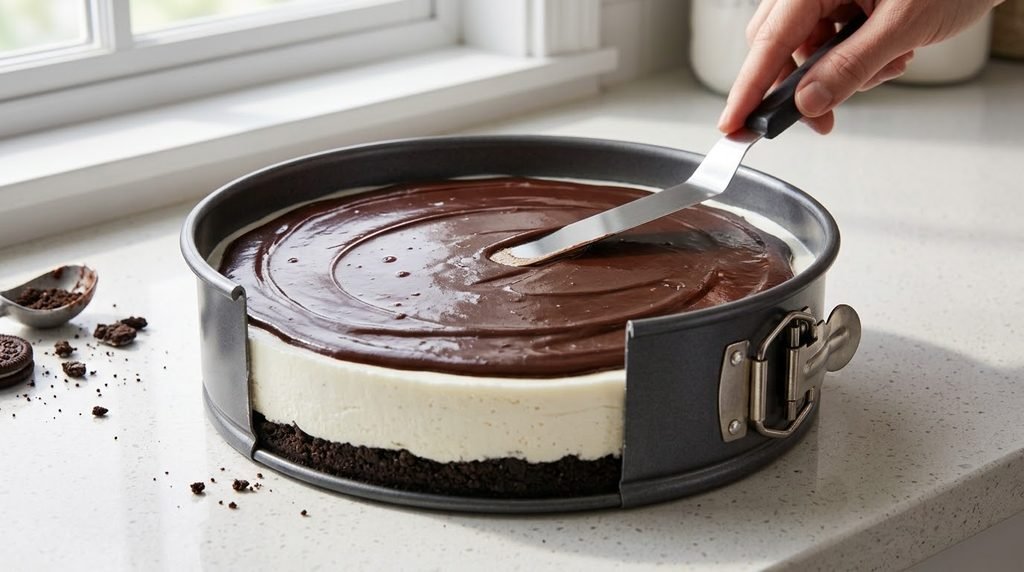
Place the pan back in the freezer for around 10 minutes, giving the fudge layer time to set before spreading the rest of the ice cream on top.
5. Finish the Ice Cream Layers
Once the fudge layer has set, carefully add the rest of the vanilla ice cream and smooth it into an even surface. Start near the center and work toward the edges to avoid disturbing the fudge beneath it.
Level the top layer with a spatula and seal the pan with a suitable cover. Freeze the cake for at least four hours, or until the ice cream has hardened enough to hold its shape when sliced.
If you are making the dessert ahead of a gathering, leave it in the freezer overnight. Keeping it covered also helps protect the surface from picking up other freezer odors.
Quick Tip: Keep the cake on a flat freezer shelf while it sets. This helps the layers freeze evenly and makes slicing easier.
6. Whip the Cream
Prepare the topping shortly before serving. Pour the cold heavy whipping cream into a chilled bowl and add the powdered sugar.
Beat with a hand mixer until the cream forms firm peaks that hold their shape. Check the consistency frequently toward the end; beating for too long can make the cream grainy.
Spread the whipped cream over the frozen cake. You can cover the entire surface or leave some of the ice cream visible around the edges.
7. Decorate and Cut the Cake
Finish with whole Oreo cookies, cookie crumbs, chocolate curls, or a little extra fudge sauce. Keep the decoration simple if you want the individual layers to remain visible when the cake is sliced.
Release the springform ring carefully. Dip a sharp knife into warm water, wipe it dry, and cut through the cake. Repeat this process between slices when needed.
Serve the portions promptly, returning any remaining cake to the freezer rather than leaving it out on the counter.

Ways to Customize This Dessert
Once you understand the basic layers, you can change a few details without changing the overall method.
- Chocolate cookie base: Use another crisp chocolate sandwich cookie if Oreo cookies are unavailable.
- Chocolate ice cream filling: Replace the vanilla ice cream with chocolate for a deeper cocoa flavor.
- Fresh fruit on the side: Strawberries or raspberries provide a fresh contrast to the rich chocolate and creamy filling.
- A lighter topping: Use a smaller amount of whipped cream or select a suitable alternative. Keep in mind that substitutions can change the texture and flavor.
- Individual servings: You can adapt the same idea for small freezer-safe dessert containers, although the assembly and freezing time will depend on their size.
Different cookies, ice cream flavors, and chocolate sauces can affect the cake’s texture, so choose alternatives that will work well together and firm up properly in the freezer.
Serving Ideas
This cake can be prepared before guests arrive, leaving only the topping and slicing to do at serving time.
For a birthday, arrange extra cookies on top or add a few candles immediately before bringing out the cake. For a summer meal, serve smaller portions with fresh berries. If you are offering it after dinner, a modest slice alongside coffee makes a simple dessert course.
When serving this dessert, add a little crushed Oreo topping to each slice or drizzle chocolate sauce over the portions just before they reach the table. These finishing touches complement the creamy ice cream and chocolate layers without making the dessert overly complicated.
Mistakes That Can Affect the Result
The Cookie Base Breaks Apart
This can happen when the crumbs are too coarse, the butter is not distributed evenly, or the base has not been pressed firmly enough. Crush the cookies thoroughly and compact the mixture before adding the ice cream.
The Ice Cream Is Difficult to Spread
Ice cream that is completely frozen can pull the crust out of place. Let it soften briefly until it is workable, then spread it while it remains cold.
The Chocolate Filling Melts the First Layer
Fudge sauce that is too warm can soften the ice cream underneath. Warm it only as much as needed and let it cool before spreading.
The Layers Blend Together
Adding the next component before the previous one has firmed up can cause the layers to mix. Follow the short freezing intervals between the first ice cream layer, fudge, and remaining ice cream.
The Cake Is Hard to Slice
A cake straight from a very cold freezer can be difficult to cut. Let it stand briefly before serving and use a warm, dry knife for cleaner portions.
How to Store Leftovers
Return leftover cake to the freezer as soon as possible. Cover the pan tightly or transfer individual portions to a suitable airtight, freezer-safe container.
For the best texture, try to enjoy the cake within about one week. It may remain frozen for longer, but the cookie base and ice cream can gradually lose some of their original texture. The whipped cream topping may also change after extended storage.
When making the cake ahead of time, leave it covered in the freezer until shortly before serving. Prepare the whipped cream and add the finishing touches just before presenting the dessert.
For the best texture, take out only the portions you plan to serve and keep the remaining cake frozen until needed.
Frequently Asked Questions
What If I Don’t Have a Springform Pan?
A standard cake pan is another option. Before assembling the dessert, cover the inside with freezer-safe plastic wrap, leaving extra wrap above the rim. Once the cake has frozen completely, use the extended edges to lift it out carefully. Support the cake from underneath as you lift it out to help prevent the cookie crust from breaking.
Can I Prepare Oreo Ice Cream Cake the Day Before?
Yes. The ice cream layers can be assembled and frozen overnight. Keep the cake covered, then add the whipped cream and decorations shortly before serving.
Which Cookies Can I Use Instead of Oreos?
Other chocolate sandwich cookies or crisp chocolate cookies may work. Because cookie size and texture vary, the final crust may be slightly different from one made with Oreos.
Is Hot Fudge Sauce Essential?
No. A thick chocolate dessert sauce can be used instead. Whatever sauce you choose, allow it to cool before it touches the ice cream so it does not soften the layers excessively.
How Can I Make the Cake Dairy-Free?
Use dairy-free alternatives for the ice cream, butter, whipped topping, and any other dairy-containing products. Check the cookies and chocolate sauce as well, because their ingredients vary by brand.
How Can I Keep the Cake Layers from Separating?
Return the pan to the freezer and allow the cake to firm up before adding another layer. During assembly, make sure each layer is stable enough to support the next one, and avoid using warm sauce.
How Do I Cut Even Slices?
Use a sharp knife warmed in water and wiped dry between cuts. Work carefully around the edge of the cake, and return the knife to the warm water whenever the ice cream begins sticking to the blade.
Conclusion
A homemade Oreo ice cream cake offers a different way to serve a familiar cookie-and-ice-cream combination. The cookie base provides a firm chocolate layer, the vanilla ice cream creates a creamy center, and the fudge adds another layer of flavor. Finishing it with whipped cream and cookie decorations makes it suitable for a celebration or an ordinary family dessert.
The most important part of this recipe is giving the layers enough time to freeze. For cleaner slices, keep the cake covered in the freezer until you are ready to add the whipped cream and serve it.
If you are learning more about gluten-free ingredients for other baking projects, visit our Gluten-Free Pantry Guide: Essential Ingredients for Baking for additional ingredient and pantry tips.
Leave a Reply