
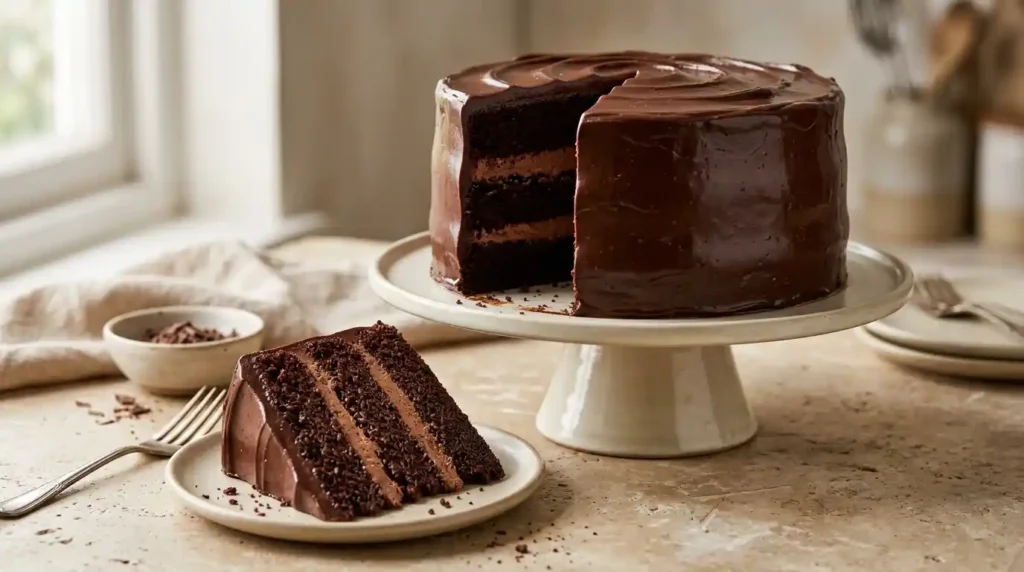
A chocolate layer cake needs more than a rich cocoa flavor. The sponge should be soft enough to slice comfortably, the filling must support the layers, and the outer coating needs the right consistency to spread without pulling the cake apart.
This eggless triple chocolate cake combines three chocolate sponge layers with whipped chocolate cream cheese frosting and a dark chocolate ganache. The batter contains no eggs, relying instead on milk, oil, an acidic ingredient, and carefully measured leavening agents.
With three chocolate components to prepare, the recipe may look complicated at first. However, separating the baking, frosting, and assembly into manageable stages makes the process easier to follow.
The most important details are accurate measurements, avoiding excessive mixing, allowing the cake layers to cool completely, and giving the ganache enough time to thicken.
Below, you’ll find the complete ingredients, detailed instructions, helpful ingredient explanations, troubleshooting tips, and storage guidance.
Eggless Triple Chocolate Cake Recipe Overview
| Recipe Details | Information |
|---|---|
| Recipe Type | Layer Cake |
| Flavor | Triple Chocolate |
| Eggs | None |
| Cake Layers | 3 |
| Pan Size | Three 8-inch (20 cm) round pans |
| Servings | Approximately 10 |
| Active Preparation | About 1 hour, estimated |
| Oven Temperature | 350°F (175°C) |
| Baking Time | Approximately 20–22 minutes |
| Additional Time | Cooling, ganache thickening, and chilling |
| Difficulty | Intermediate |
| Preparation Planning | Some components can be prepared the day before |
A note about timing: The estimated preparation time refers to active work, not the complete process. The ganache must thicken before decorating, the cake layers need to cool, and the assembled dessert requires additional refrigeration.
Plan for several hours beyond the mixing and baking time. Allow some flexibility in your schedule, as oven performance and the time needed for cooling and chilling can vary from one kitchen to another.
Table of Contents
Ingredients for Eggless Triple Chocolate Cake
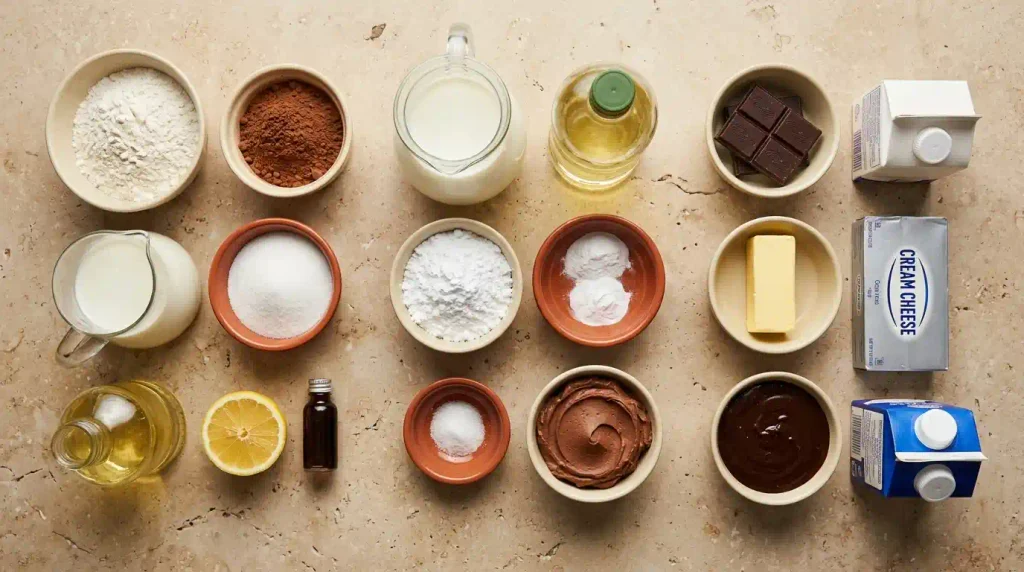
This recipe has three main components: the chocolate sponge, the whipped cream cheese filling, and the dark chocolate ganache.
Measure the ingredients for each component separately before beginning. The cake and frosting both contain cocoa powder, while the ganache and frosting use different amounts of whipping cream.
Keeping the ingredient groups organized makes it easier to follow the recipe without mixing up the quantities.
For the Eggless Chocolate Cake Layers
- 360 ml milk, at room temperature
- 90 ml water, at room temperature
- 1½ tablespoons lemon juice or white vinegar
- 270 g cane sugar or caster sugar
- 120 ml neutral baking oil
- 1 teaspoon vanilla extract
- 315 g all-purpose flour
- 52 g unsweetened cocoa powder
- 1⅛ teaspoons baking powder
- 1¼ teaspoons baking soda
- ¼ teaspoon salt
For the Chocolate Truffle Ganache
- 360 ml whipping cream
- 2 tablespoons light corn syrup, maple syrup, honey, or agave syrup
- 90 g softened butter
- 375 g dark chocolate, approximately 55% cocoa, or semisweet chocolate
For the Whipped Chocolate Cream Cheese Frosting
- 340 g cold cream cheese
- 65 g unsweetened cocoa powder, sifted
- 150 g powdered sugar, sifted
- 1 teaspoon vanilla extract
- 300 ml cold whipping cream
Equipment You’ll Need
- Three 8-inch (20 cm) round cake pans
- Parchment paper
- Digital kitchen scale
- Large and medium mixing bowls
- Fine-mesh sieve
- Whisk and rubber spatula
- Electric hand mixer or stand mixer
- Heatproof bowl and saucepan
- Wire cooling rack
- Offset spatula
- Cake board or sturdy serving plate
A digital scale is particularly helpful when preparing layered cakes. Measuring the flour, cocoa, and chocolate by weight reduces variations that can affect texture.
How to Make Eggless Triple Chocolate Cake
The preparation works best when the components are handled in a practical order.
Begin with the ganache because it needs time to thicken. Next, bake and cool the chocolate sponges. Make the whipped filling closer to assembly so it stays cold and easier to spread.
Step 1: Prepare the Chocolate Truffle Ganache
Chop the dark chocolate into small, relatively even pieces and place them in a heatproof bowl.
In a saucepan, combine the whipping cream, softened butter, and your chosen syrup.
Place the saucepan over medium-low heat, gently stirring from time to time as the butter melts into the cream.
When it begins to steam and approaches a gentle simmer, remove the saucepan from the heat. Avoid prolonged boiling.
Carefully tip the hot cream mixture into the bowl, making sure it covers the chopped chocolate.
Let it stand for approximately one minute before stirring.
Begin stirring slowly in the center of the bowl, gradually working outward until the chocolate melts and the mixture becomes smooth.
If a few chocolate pieces remain, stir a little longer. Use only gentle additional heat if necessary.
Transfer the ganache to a shallow, heat-safe container. Once the initial steam has dissipated, press food-safe plastic wrap directly against its surface, then refrigerate it until thick and spreadable.
Depending on the chocolate and refrigerator temperature, this may take several hours.
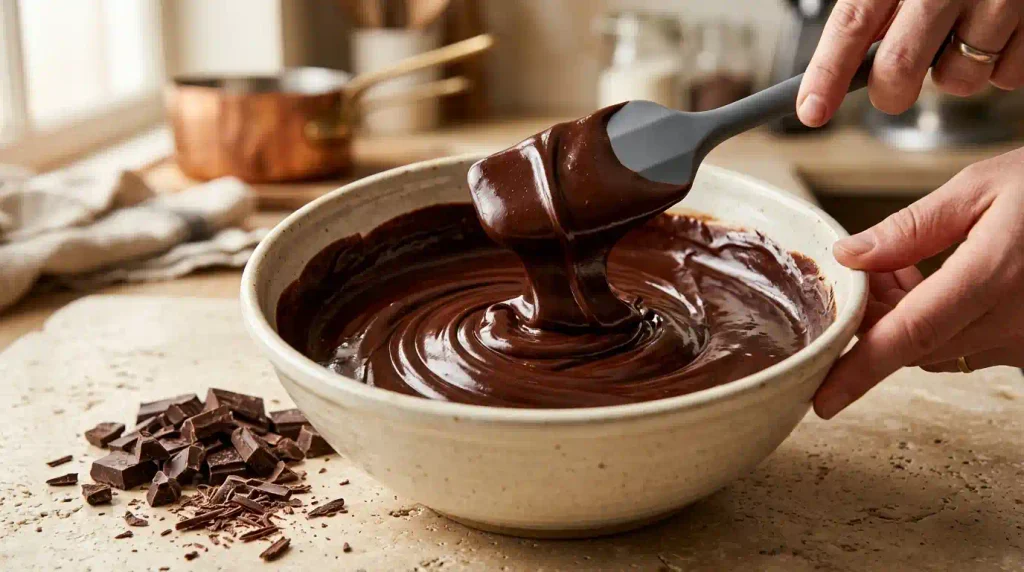
What to look for: The ganache should hold its shape on a spatula while remaining soft enough to spread over the cake.
If it becomes very firm during refrigeration, let it soften briefly before decorating. Avoid leaving the dairy-based mixture at room temperature for extended periods.
Step 2: Prepare the Cake Pans and Oven
Preheat the oven to 350°F (175°C).
Position an oven rack near the center so the cake layers can bake with reasonably even heat.
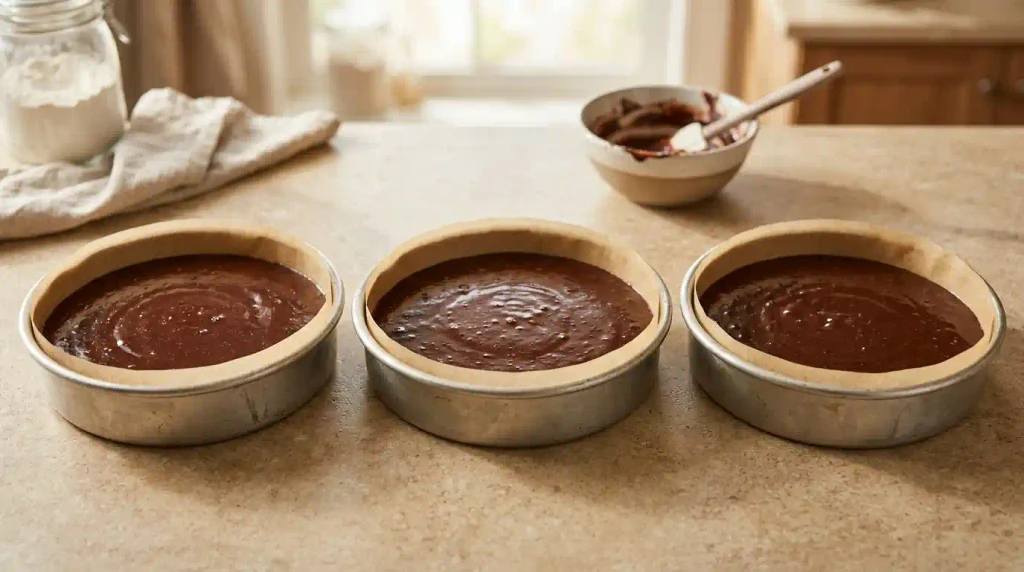
Lightly grease three 8-inch round cake pans.
Cut parchment paper into circles that fit the bottoms of the pans, then place them inside.
Make sure the parchment lies flat and the pans are deep enough to hold the batter.
Using pans of similar size and material is helpful because different baking pans can heat at different rates.
Step 3: Prepare the Milk Mixture
Start by measuring the room-temperature milk into a bowl large enough to accommodate the remaining wet ingredients.
Add the lemon juice or white vinegar and stir gently.
Set the bowl aside for about five minutes before adding the remaining wet ingredients.
It may appear slightly thickened or separated. This is an expected reaction when an acidic ingredient is combined with milk.
Add the room-temperature water, neutral oil, sugar, and vanilla extract.
Whisk until the liquids are evenly combined and the sugar is distributed throughout the mixture.
There is no need to whip the mixture vigorously at this stage.
Step 4: Combine the Dry Ingredients
In another bowl, measure the flour, cocoa powder, baking powder, baking soda, and salt.
Sift the ingredients together to break up cocoa lumps and distribute the raising agents.
Pay attention to the measurements:
- Baking powder: 1⅛ teaspoons
- Baking soda: 1¼ teaspoons
Although both ingredients help the cake rise, baking powder and baking soda are not interchangeable.
After filling each measuring spoon, scrape a straight edge across the top to remove any excess baking powder or baking soda.
Accurate measurements are especially important in an eggless cake because the balance of ingredients helps determine how the batter rises.
Step 5: Make the Chocolate Cake Batter
Add the sifted dry ingredients to the liquid mixture.
Using a whisk or rubber spatula, combine everything gently until no dry flour remains.
Scrape the bottom and sides of the bowl to incorporate any ingredients that may have collected there.
Stop mixing once the batter becomes uniform.
Avoid continuing to beat the mixture after the flour is fully incorporated.
Excessive mixing can develop gluten and result in a firmer cake texture.
The finished batter should have an even chocolate color without visible flour pockets.
Step 6: Divide and Bake the Cake Layers
Pour the chocolate batter into the three prepared pans, using a kitchen scale to give each pan a similar amount for evenly sized layers.
Place the pans in the preheated oven.
Bake for approximately 20–22 minutes, using this as an estimated range rather than a guaranteed finishing time.
Begin checking the cakes near the earlier end of that period.
To check if a cake layer is ready, gently push a wooden toothpick into its middle, then pull it out to inspect the result.
The cake should be set, with no wet batter clinging to the tester. A few moist crumbs are acceptable.
The surface may also look matte rather than shiny, and the center may spring back gently when touched.
For additional guidance, see King Arthur Baking’s guide to telling when a cake is done.
Avoid leaving the layers in the oven simply because the timer has not finished. Oven performance and pan materials can change the actual baking time.
Step 7: Cool the Chocolate Cake Layers
Once the chocolate layers are fully baked, take the pans out of the oven and set them on a heatproof surface.
Leave them in their pans for approximately 10–15 minutes.
Carefully loosen the edges and transfer the layers to a wire rack.
Allow them to cool completely before adding frosting.
The filling contains cream cheese and whipped cream, so spreading it over warm cake can soften the mixture and make assembly more difficult.
If the layers will be used later, wrap them once they have completely cooled.
Step 8: Make the Whipped Chocolate Cream Cheese Frosting
Take the cream cheese straight from the fridge and add it to a bowl with enough room for the remaining frosting ingredients.
Beat briefly with an electric mixer until smooth.
Mix half of the sifted powdered sugar into the cream cheese, then add the remaining half and stir until fully incorporated.
Next, add the sifted cocoa powder and vanilla extract.
Mix at a low speed until the ingredients are incorporated, then scrape down the bowl.
Gradually pour in the cold whipping cream, mixing gently between additions.
Once the cream is incorporated, increase the mixer speed as needed and beat until the frosting becomes airy and reaches medium peaks.
To check the texture, lift the beaters.
The frosting should hold a soft peak that bends slightly at the tip.
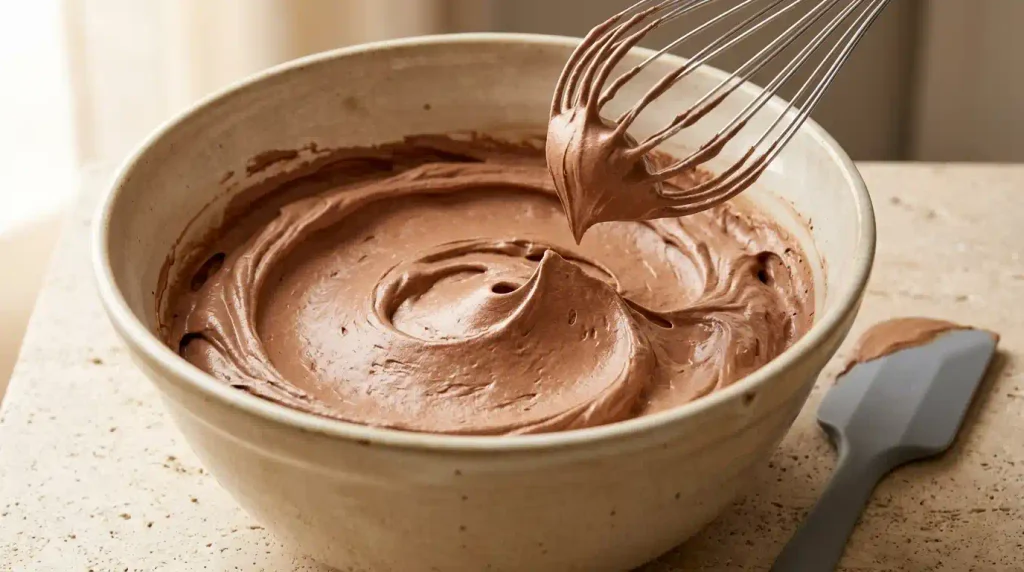
Stop mixing when it reaches this stage.
Overwhipping can cause the mixture to become grainy or lose its smooth consistency.
Cover the bowl and place the frosting in the fridge while you prepare the cooled cake layers for assembly.
Step 9: Assemble the Chocolate Cake Layers
Place the first fully cooled cake layer on a cake board or sturdy serving plate.
Spoon a portion of the chocolate cream cheese frosting onto the center.
Spread it toward the edges with an offset spatula, creating an even layer.
Carefully position the second chocolate sponge over the filling.
Add another layer of frosting and spread it evenly.
Place the third sponge on top.
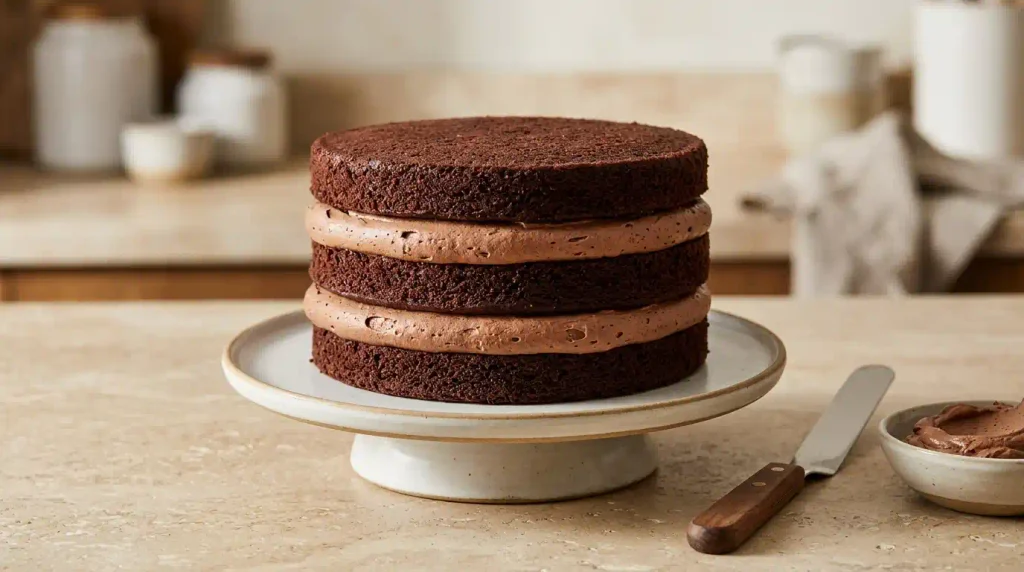
Look at the cake from the side to make sure the layers are reasonably aligned.
Avoid pressing down firmly, as this can push the filling out between the layers.
If the frosting begins to soften and the cake becomes unstable, refrigerate it briefly before continuing.
Step 10: Apply a Thin Crumb Coat
Take the frosting left in the bowl and use an offset spatula to coat the assembled cake, beginning at the top and working around the sides.
Start with a thin layer.
This coating helps hold loose crumbs in place and provides a smoother surface for the ganache.
A few visible cake crumbs or slightly uneven areas are acceptable at this stage.
Spread the frosting with gentle movements to avoid damaging the sponge.
Place the coated cake in the refrigerator for approximately 30 minutes, or until the surface feels sufficiently firm for the next step.
Step 11: Cover the Cake With Chocolate Ganache
Take the chilled ganache out of the fridge and lift a little with a spatula to check its texture. It should be easy to smooth over the cake without running down the sides.
If it is too firm, allow it to soften briefly and stir gently.
Start by placing a generous spoonful of ganache in the center of the chilled cake.
Using an offset spatula, gently guide the chocolate ganache from the center toward the outer edge until the top is evenly covered.
Add more ganache to the sides of the cake, turning it gently as you go to cover any exposed areas.
Smooth the coating with a spatula or cake scraper.
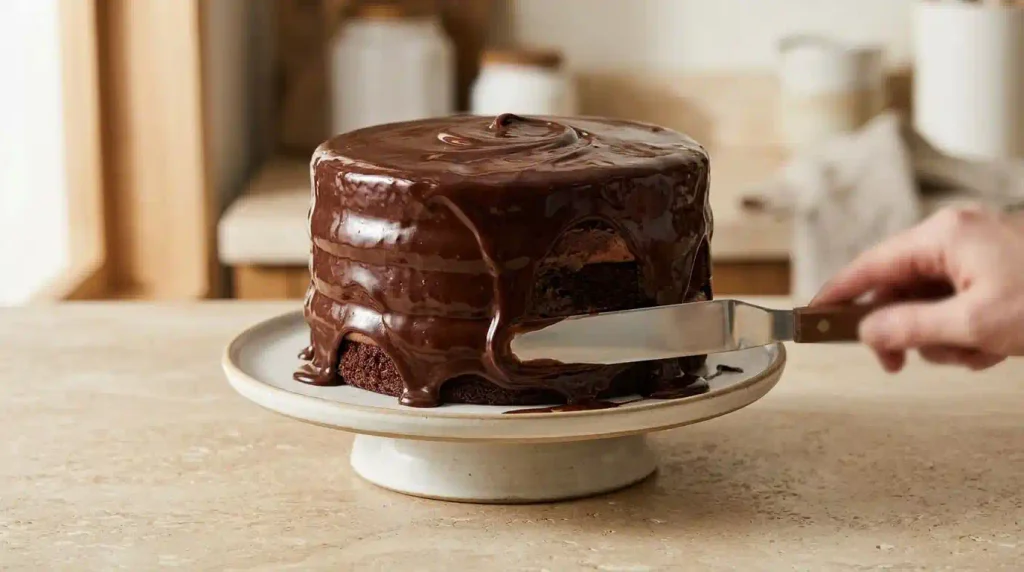
For a simple decoration, leave gentle chocolate swirls on the surface.
You can also create a smoother finish by carefully leveling the sides and top.
Avoid repeatedly scraping the same area, since excessive handling may disturb the layer underneath.
Step 12: Chill, Slice, and Serve
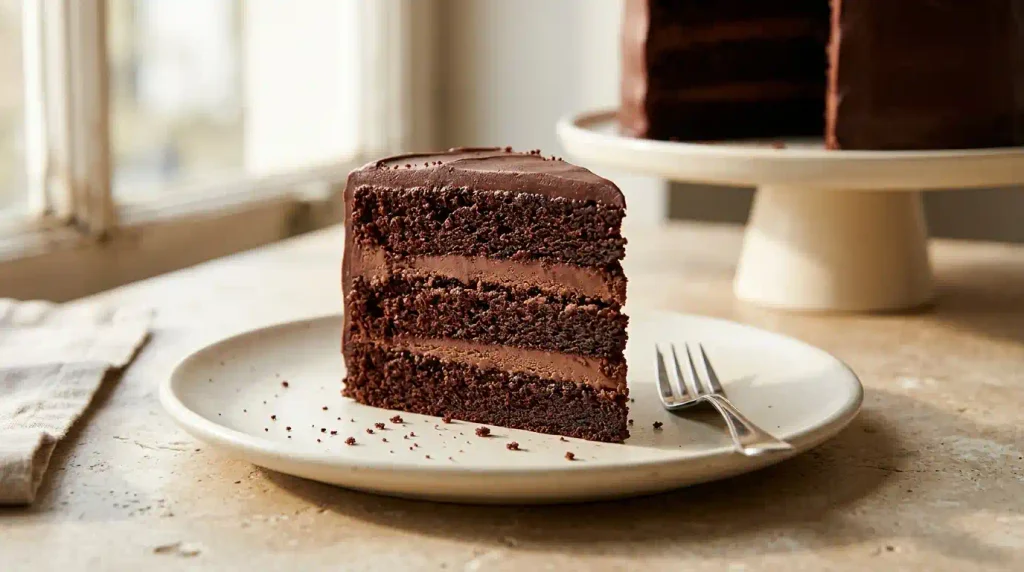
Once the cake is fully decorated, leave it in the fridge for about 2–3 hours, allowing the chocolate filling and ganache to set before serving.
Use a sharp knife to cut the cake.
For cleaner cuts, dip the knife briefly in hot water, wipe it dry, and remove any chocolate or frosting from the blade between slices.
Because the cake contains whipped cream and cream cheese frosting, return any leftovers to the refrigerator promptly.
Important Ingredient Tips for Better Results
The balance of ingredients affects how soft the chocolate sponge turns out, how well the frosting holds its shape, and how firmly the ganache sets.
Why Milk and Lemon Juice Work Together
Mixing a little lemon juice or vinegar into the milk creates a more acidic liquid for the chocolate cake batter.
The acidic ingredients react with baking soda, contributing to the gas formation that helps the cake rise.
This reaction is part of the recipe’s egg-free structure.
The milk mixture may appear slightly curdled after resting, but that does not mean it needs to be discarded.
Natural Cocoa Powder vs. Dutch-Processed Cocoa
Natural cocoa powder is acidic, while Dutch-processed cocoa has been treated to reduce its acidity.
This distinction matters because acidity can influence the reaction of baking soda in cake batter.
The recipe already contains lemon juice or vinegar, so several ingredients contribute to the batter’s overall acidity.
For more information about how cocoa processing affects baking, read King Arthur Baking’s guide to natural and Dutch-process cocoa.
Natural unsweetened cocoa powder is a reasonable starting choice for this formula.
Avoid replacing baking cocoa with sweetened drinking chocolate powder because the ingredients and sugar content are different.
Why the Cake Uses Oil Instead of Butter
Neutral baking oil contributes moisture without adding a strong flavor.
Unlike butter, oil remains liquid at cooler temperatures.
This can be helpful for a layer cake that needs to spend time in the refrigerator after assembly.
Sunflower oil or another mild vegetable oil is suitable.
Oils with a bold taste, such as some extra-virgin olive oils, can leave a noticeable flavor in the finished chocolate sponge.
Why Flour Measurements Matter
Using too much flour can make a cake heavier or drier.
This recipe contains 315 g of all-purpose flour.
A digital scale is a useful way to measure that quantity accurately.
If measuring by volume, avoid packing the flour tightly into a measuring cup.
Do not add extra flour simply because the batter appears thinner than a butter cake batter.
Choosing Chocolate for the Ganache
Dark chocolate containing approximately 55% cocoa provides a balance of chocolate flavor and sweetness for the specified ganache.
Using chocolate with a much higher cocoa percentage may produce a stronger flavor and a different consistency.
Milk chocolate can make the mixture sweeter and may change how firmly it sets.
For a smooth ganache, choose a plain baking chocolate bar without nuts, caramel, or other fillings that could affect the finished texture.
How to Get the Right Cake, Frosting, and Ganache Texture
Before assembly, each component should have a consistency suited to its role.
| Component | Desired Texture | Warning Signs |
|---|---|---|
| Chocolate sponge | Soft crumb with a fully set center | Wet batter or excessively dry edges |
| Cream cheese frosting | Smooth, airy, medium peaks | Very loose, lumpy, or grainy |
| Chocolate ganache | Thick, smooth, and spreadable | Runs off the spatula or becomes too hard to spread |
If the chocolate layers still feel warm, give them more time to cool before stacking, as the heat can soften the cream cheese frosting and cause it to slip out between the layers.
The ganache should be thick enough to coat the sides but soft enough to smooth without tearing the frosting underneath.
If a component is not ready, address its consistency before beginning the next stage.
A short period of cooling or refrigeration is generally easier to manage than trying to repair an unstable assembled cake.
Common Problems and How to Fix Them
The Chocolate Cake Is Too Dense
A heavy sponge may result from inaccurate flour measurements, excessive mixing, or raising agents that are no longer effective.
Check the baking powder and baking soda before starting.
Weigh the flour for better accuracy, and stop stirring the batter as soon as no dry flour remains visible.
Once the batter is ready, divide it among the pans and bake without an unnecessary delay.
The Cake Becomes Dry
Dry cake may result from overbaking, excess flour, or differences in oven temperature.
Begin checking for doneness near the earlier end of the estimated baking range.
A toothpick should not come out coated with wet batter, but there is no need to wait until the cake becomes noticeably dry.
The Cake Layers Rise Unevenly
Uneven layers can result from differences in batter quantities, oven heat, or pan size.
Weigh the batter before dividing it and use matching pans if possible.
Once the cake layers have cooled, use a serrated knife to gently level any raised tops so the layers stack more evenly.
The Frosting Has Small Lumps
Lumps can develop when the cream cheese is not smooth before the other ingredients are added.
Use an electric mixer to break up any firm bits in the cream cheese before adding the other ingredients.
Sift the cocoa powder and powdered sugar, then incorporate them gradually.
Avoid relying on prolonged high-speed whipping to remove lumps after the cream has already been added.
The Cream Cheese Frosting Is Too Soft
Soft frosting can make the cake difficult to stack.
Warm ingredients, insufficient whipping, or a warm kitchen may contribute to the problem.
Keep the frosting refrigerated while preparing the cake layers.
If the frosting starts losing its shape while you stack the layers, pause and chill it until it becomes firm enough to spread without sliding.
The Ganache Is Too Runny
Warm ganache may not hold its shape on the cake.
Place it in the refrigerator and check it at intervals until it thickens.
Do not pour thin ganache over the cake if the intended finish is a thick, smooth coating.
The Ganache Is Too Firm
After several hours in the fridge, the ganache may become too stiff to spread smoothly over the cake.
Allow it to soften briefly and stir gently before using it.
Avoid adding extra cream automatically, since this changes the balance of the ganache ingredients.
The Cake Slides During Assembly
If the cake begins to lean, the filling may be too soft, the layers may be uneven, or the filling may be concentrated too heavily in the center.
Check the alignment and refrigerate the cake until it becomes more stable.
Avoid pressing the upper layers down forcefully, as this may squeeze out the filling.
Dairy-Free Ingredient Options
The cake does not contain eggs, but the original recipe is not dairy-free.
It contains milk, whipping cream, cream cheese, and butter.
Preparing a dairy-free version would require substitutions in all three components.
Dairy-Free Chocolate Cake Layers
Unsweetened soy milk or oat milk may be used as an alternative to dairy milk.
Choose an unflavored product without added sweeteners where possible.
Plant-based milks vary in composition, so the resulting cake may have a slightly different texture.
Dairy-Free Chocolate Ganache
A dairy-free version would require plant-based whipping cream, dairy-free butter, and chocolate made without milk ingredients.
Read chocolate labels carefully because not every dark chocolate product is dairy-free.
If you also want the cake to be vegan, use a plant-based syrup such as maple syrup rather than honey.
Dairy-Free Chocolate Cream Cheese Frosting
Plant-based cream cheese and dairy-free whipping cream are possible alternatives.
However, their fat and moisture contents vary considerably between brands.
Some products produce a stable whipped texture, while others may remain softer.
Choose products intended for whipping and frosting, and expect that the setting time or final consistency may differ.
Important: These substitutions are possible adaptations, not independently tested versions of the recipe. They should not be assumed to give identical results.
Make-Ahead and Storage Instructions
This cake contains several components, so preparing some of them in advance can make the assembly easier to manage.
Preparing the Chocolate Cake Layers Ahead
Bake the chocolate sponges and allow them to cool completely.
Wrap each layer individually to reduce drying.
If storing the cake layers for a longer period, freezing the plain sponges is generally simpler than freezing the fully decorated cake.
When you’re ready to use the frozen cake layers, keep them wrapped as they thaw to reduce moisture collecting directly on the sponge.
Making the Ganache Ahead of Time
The chocolate ganache can be prepared before the day of assembly.
Pour the freshly made ganache into a container, cover it, and let it thicken in the fridge rather than leaving the cream-based mixture on the counter for hours.
When ready to decorate, check the texture and allow it to soften briefly if necessary.
Storing the Finished Cake
Because the filling contains cream cheese and whipped cream, the assembled cake should be refrigerated.
Place it in a covered cake container and keep it at 40°F (4°C) or below.
As a practical guideline, aim to use properly refrigerated portions within approximately 3–4 days, assuming the cake has been handled and stored safely.
According to the USDA’s food safety guidance, foods that require refrigeration should be chilled within two hours, or within one hour when the temperature is above 90°F (32°C).
Remove the cake from the refrigerator only when necessary for decorating, slicing, or serving.
Can You Freeze the Finished Cake?
A completed layer cake can be frozen, but the cream cheese and whipped cream frosting may change texture after thawing.
For easier storage, consider freezing the plain sponge layers and preparing the filling closer to assembly time.
If freezing the decorated cake, protect it from freezer odors and thaw it in the refrigerator rather than at room temperature.
Another Make-Ahead Dessert Option
If you’re planning a celebration and would prefer a chilled dessert without baking, our Oreo Ice Cream Cake Recipe offers another chocolate-based option.
It combines a cookie crust, ice cream, and chocolate fudge, making it a different dessert that can be assembled in advance and stored in the freezer.
Frequently Asked Questions
Can You Make Triple Chocolate Cake Without Eggs?
Yes. This recipe uses an egg-free chocolate sponge made with milk, oil, flour, cocoa powder, and chemical leavening agents.
The acidic ingredient contributes to the reaction with baking soda, helping the batter rise without eggs.
What Makes This a Triple Chocolate Cake?
The dessert contains three chocolate components.
Cocoa powder flavors the sponge, chocolate cream cheese frosting separates the layers, and dark chocolate ganache covers the outside.
Each component contributes a different texture.
Can I Use Two Cake Pans Instead of Three?
The ingredient quantities are intended for three 8-inch round pans.
Using two pans would produce thicker layers and may change the baking time.
If using two pans, make sure they are deep enough to hold the extra batter, and expect the thicker layers to need more baking time. Check the centers for doneness rather than relying on the original 20–22 minute estimate.
Can I Use Dutch-Processed Cocoa Powder?
Dutch-processed cocoa has different acidity from natural cocoa.
Because this batter includes baking soda and an acidic milk mixture, changing the cocoa may influence the cake’s color, flavor, and rise.
For a more predictable starting point, use natural unsweetened cocoa powder.
Why Does the Recipe Use Both Baking Powder and Baking Soda?
Both contribute to leavening, but they work differently.
Baking soda reacts with acidic ingredients, while baking powder contains ingredients that allow it to produce gas when hydrated and heated.
The specified quantities should be measured separately.
Can I Make the Cake Less Sweet?
Reducing sugar can affect the sponge’s moisture and structure or the consistency of the frosting.
Choosing a slightly darker chocolate may create a less sweet flavor impression, although it can also change the ganache texture.
Any significant changes to the sugar quantities would require testing.
How Long Should the Cake Chill Before Serving?
The assembled cake is intended to chill for approximately 2–3 hours.
The exact time depends on the thickness and temperature of the filling and ganache.
The cake should feel stable enough to slice without the layers shifting.
Can I Prepare This Chocolate Layer Cake a Day Ahead?
Yes. The cake layers and ganache can be prepared ahead, and the finished cake can be refrigerated overnight when stored safely.
Keeping the dessert covered helps protect it from drying and absorbing refrigerator odors.
How Do I Get Clean Slices?
Chill the assembled cake until the filling and ganache are firm enough to hold their shape.
A long, sharp knife makes it easier to cut through all three layers, while wiping the blade after each slice helps prevent chocolate smudges.
Briefly warming the blade in hot water and drying it before slicing can also help produce neater edges.
Is Eggless Triple Chocolate Cake Vegan?
No. Eggless does not mean vegan.
The original ingredients include milk, cream cheese, butter, and whipping cream.
A vegan variation would require suitable plant-based replacements, and the other ingredient labels would need to be checked.
Final Thoughts
An eggless triple chocolate cake combines three chocolate preparations in one layered dessert: a soft cocoa sponge, an airy chocolate cream cheese filling, and a smooth dark chocolate ganache.
The recipe involves several stages, but an organized approach makes the work easier to manage. Measuring ingredients carefully, handling the batter gently, cooling the sponges completely, and allowing enough time for the fillings to set are the most important practical details.
For a cake with several layers, there’s no need to rush the assembly. Taking time to check each component’s consistency helps make stacking, coating, and slicing more manageable.
If you’re looking for a smaller chocolate dessert instead of a full layer cake, try our Easy Gluten-Free Chocolate Chip Cookies. They offer a different chocolate treat with a simpler serving style, although that cookie recipe contains eggs.
Leave a Reply